The 2 Death Mini Series, The Death Gallery Book and Captain Atom 42 (a rare mainstream Death appearance).
The
first of two binds of Todd McFarlane's early run on Infinity inc. It
is early Todd art but he already had a flair for capes!
A whole lot of Lobo minis and one shots.
Longshot! Art Adams arrived with a sonic boom.
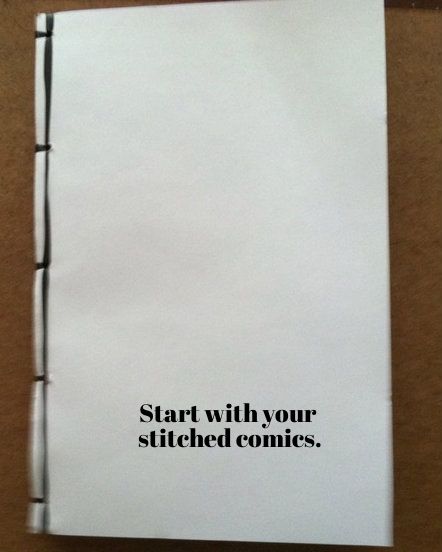
I hope to get the next tutorial up tomorrow. Covers step 1.
Bean
Thursday, February 27, 2014
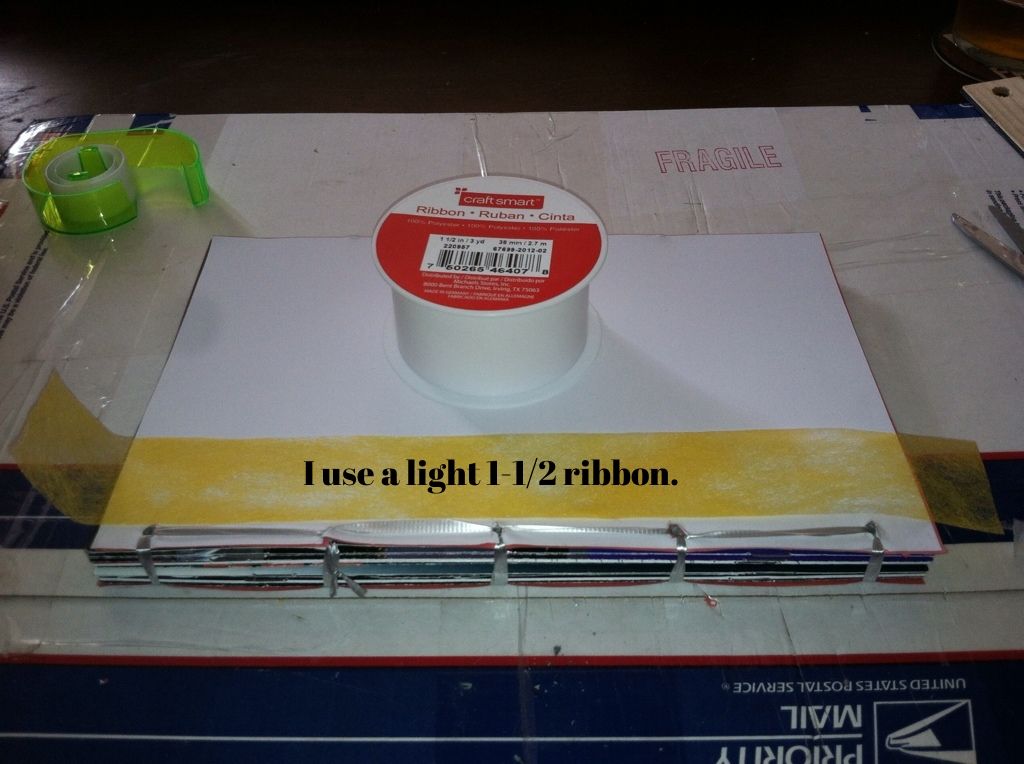
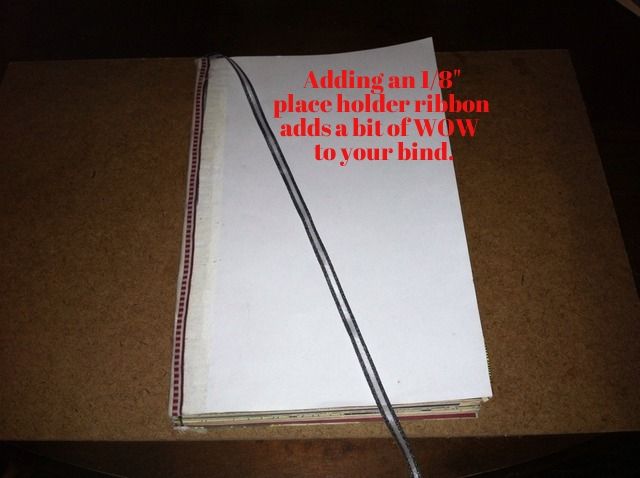
Spine Ribbon and Place Holder Ribbon
This step is not quite as fun as pressing and drilling but is a necessary process to give some extra structural integrity to your book. The place holder ribbon is not required but it is easy to do and adds a bit of pizazz you book.
Double check your pressed and stitched stack one more time to make sure everything is in order. As I have said earlier, almost nothing is unfix-able, but now is the best time to catch an error.
For the spine ribbon, I prefer a loose light ribbon that I get from the dollar bin at Micheals. it seems to adhere better than dense ribbon and is easier to work with.
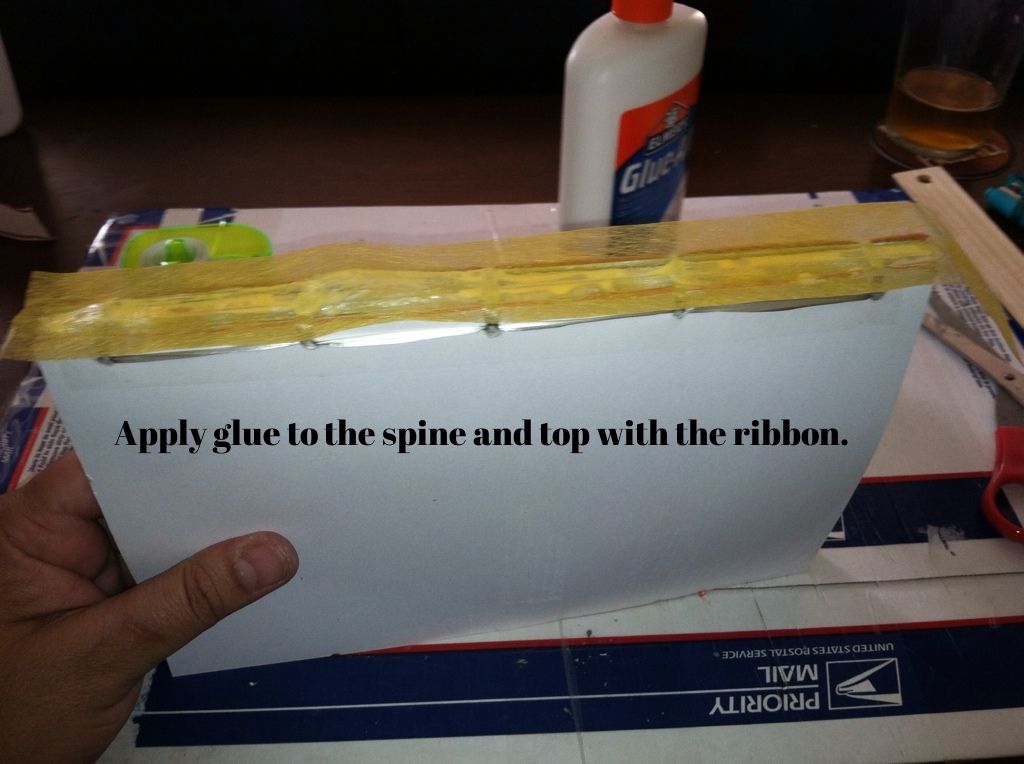
Apply a lot of glue to the spine and top it off with the ribbon. Don't worry too much about overflow. it will be used to adhere the sides of the ribbon to the front and back of the bind.
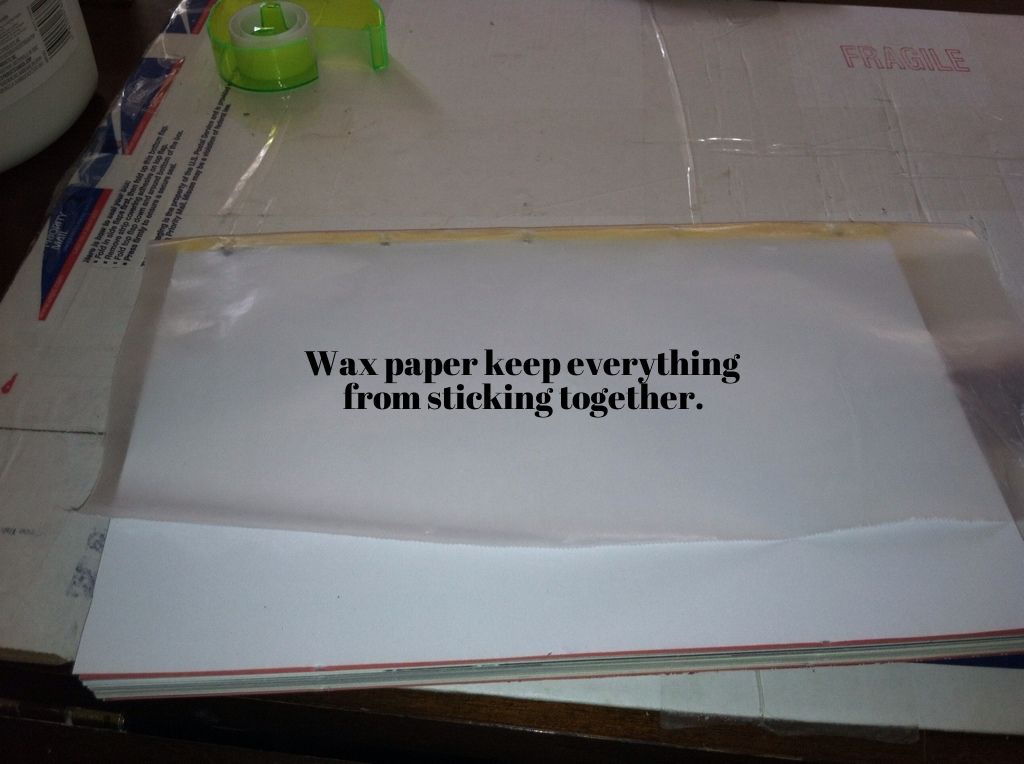
Wrap up the bind with wax paper. It excess glue will not stick to it! I then put the bind on a hard flat surface and put a heavy book on top (I use my Kiss Kompendium. It's big and heavy).
I used to then add a 2nd denser spine ribbon and glue in a place holder ribbon, but I have decided to do away with the 2nd ribbon and insert the place holder with the original spine ribbon. If you bind is over 12 to 14 issues, you may want to consider adding a 2nd ribbon to the spine.
Like I wrote earlier, this is not the most fun step but it is in many ways the foundation of your bind.
Thanks for checking my tutorial out and don't hesitate to ask questions.
Bean
Sunday, February 23, 2014
Stitching
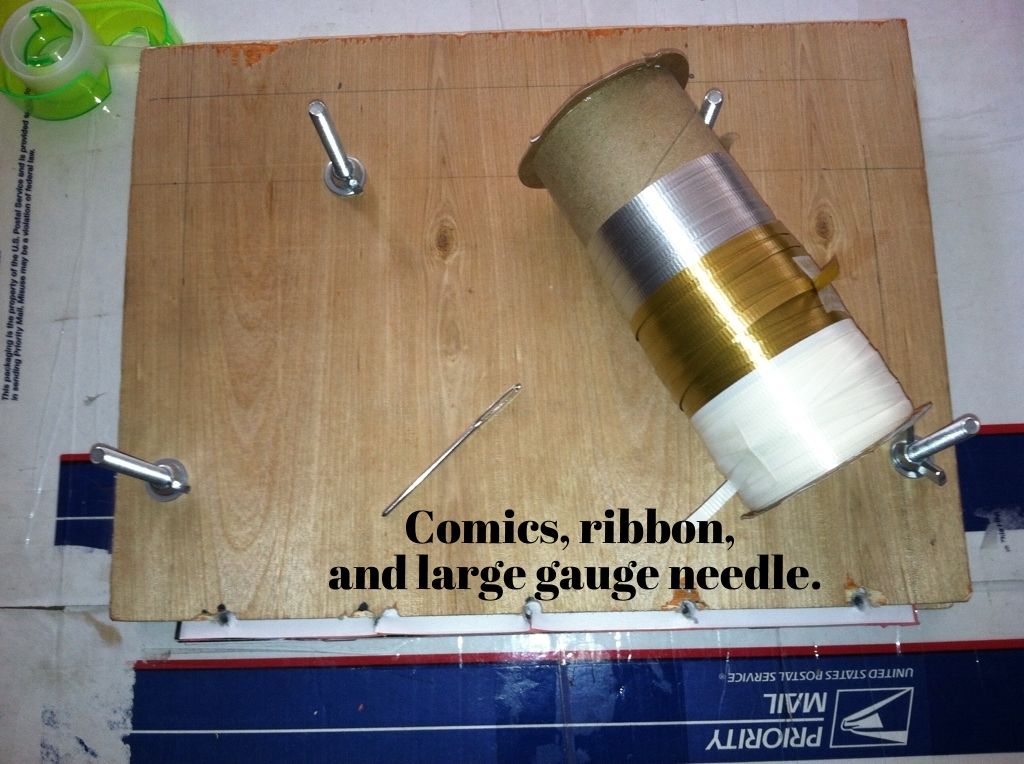
I use a modified version of Japanese Stitching on my binds. You can google search or youtube many tutorials on the process. Most of the official tutorials on Japanese stitching are more conscious of keeping knots and lines clean, but this is not as important for comic binding. Any knots or lines are hidden once the bind is complete. I will ultimately upload a video of my process, but in the mean time, here are some photos of my process.
Get a large spool of 1/8" plastic ribbon from Dollar Tree. I don't know the exact gauge of the sewing needle but it is about 2-3/4" long and 1/16 thick. The needle can be picked up at Michael's (use your coupons!)
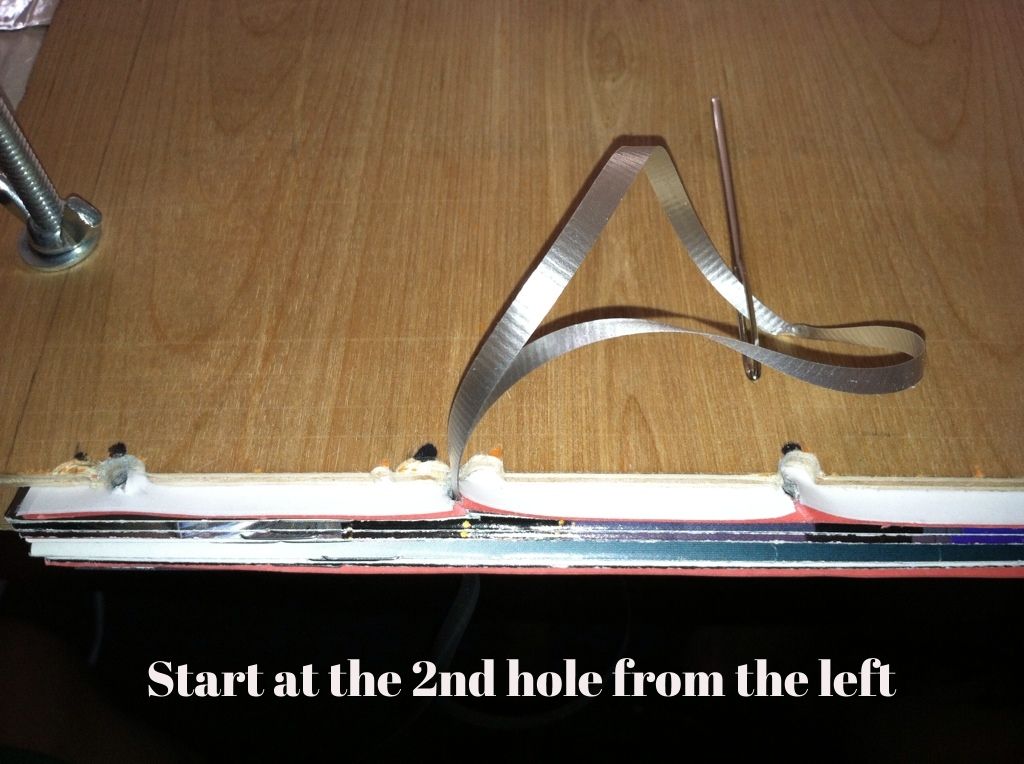
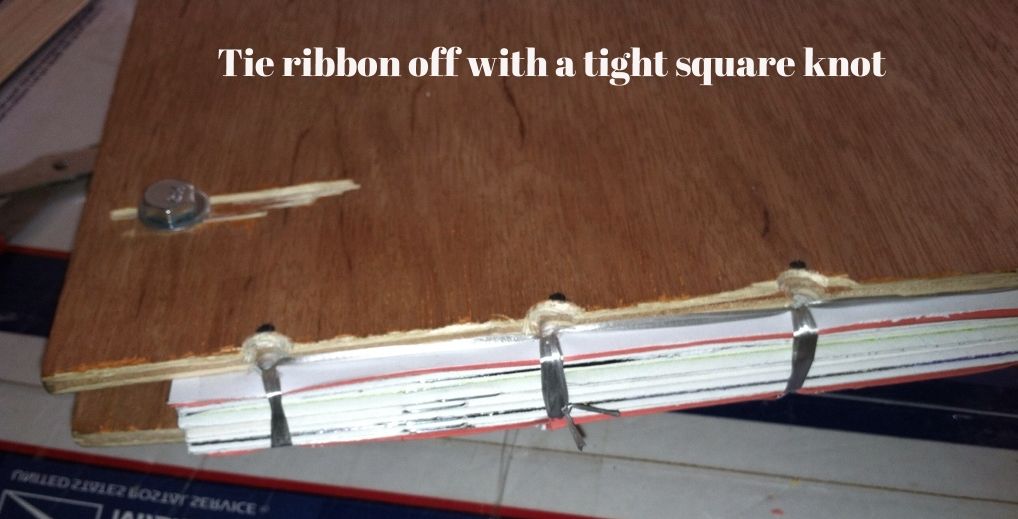
Measure out approximately 4 times the length of your comics in ribbon. Thread the needle and start up through the 2nd hole from the left. Loop around once and then move on to the 3rd hole from the left.
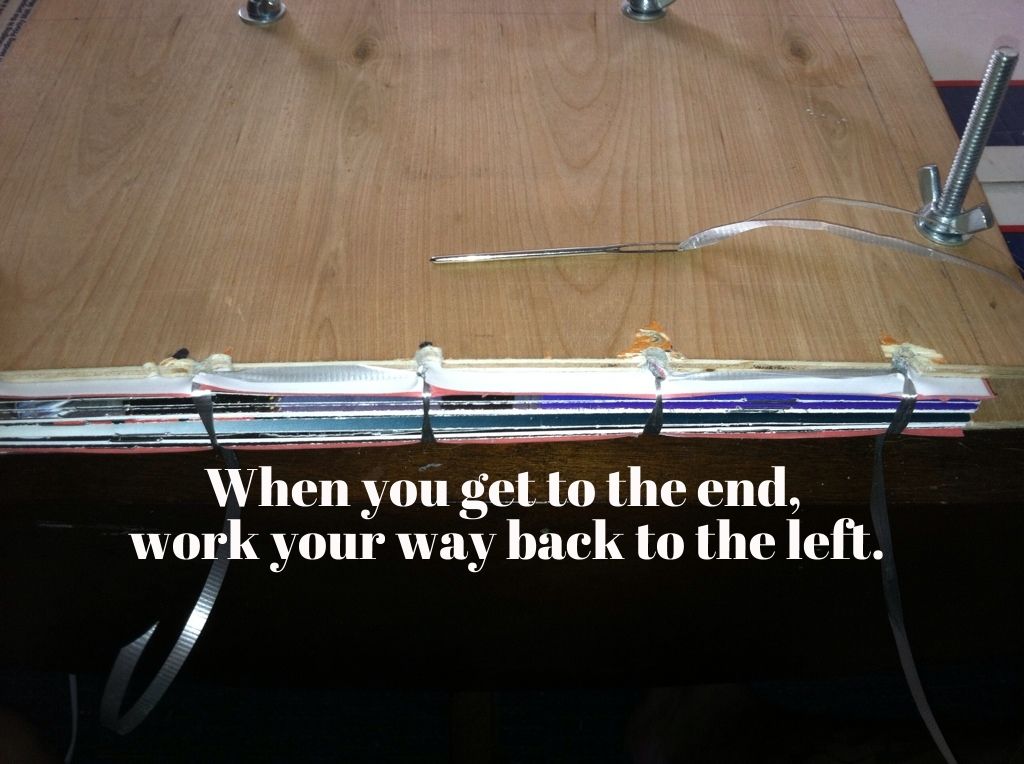
Once you get to the last hole, work your way back to the left. You may need pliers to help coax the need through the holes. Don't forget that tighter is better.
Keep working left and when you get to the last hole move back to your starting position (the 2nd hole from the left).
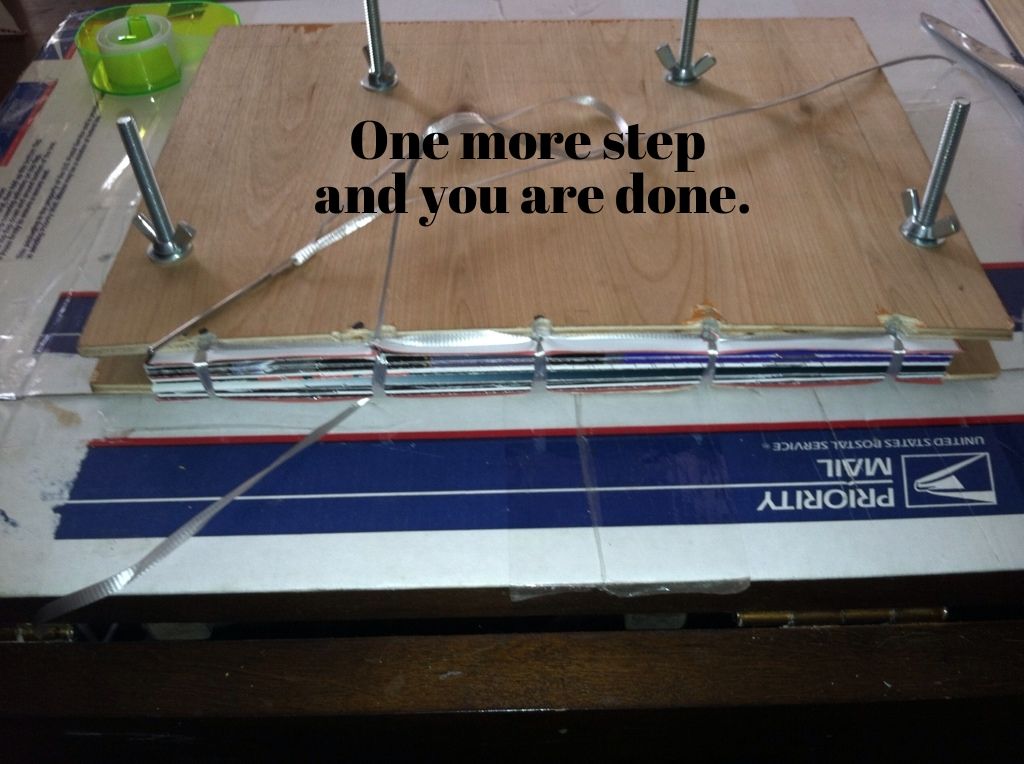
All stitched up and time to tie off your ribbon. Note: the comics have been in the press the whole time. This allows you to keep the bind tight and square.
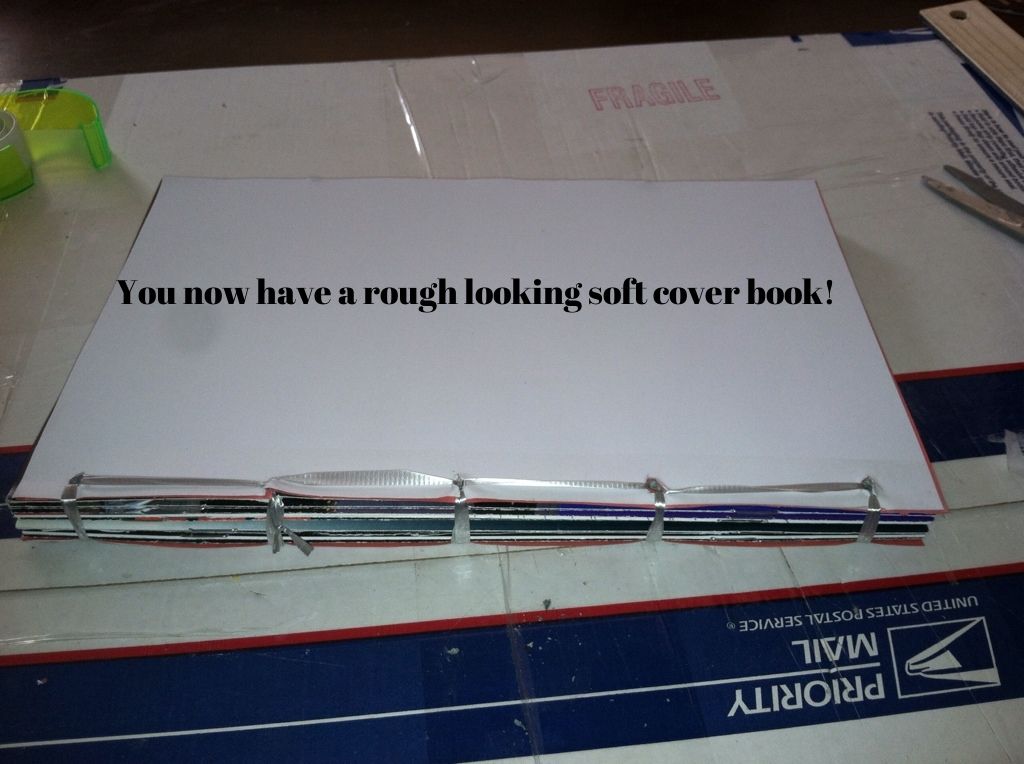
You now can loosen your wing nuts and pull your book out. Yes, it is now a book. We still have a bit of work to go before you can put it on your bookshelf but you are almost halfway to having your own custom bound hardcover collection!
Please don't hesitate to leave any feedback and thank you for visiting the site.
Bean
Pressing and Drilling
Pressing and drilling your comics is the first step where you really feel like you are making a book. For me it is where the fun really begins, but it can be a bit harrowing when you first put a power drill to your comics. Don't fret, the whole process is pretty forgiving and mistakes are generally not seen once the book bind is completed.
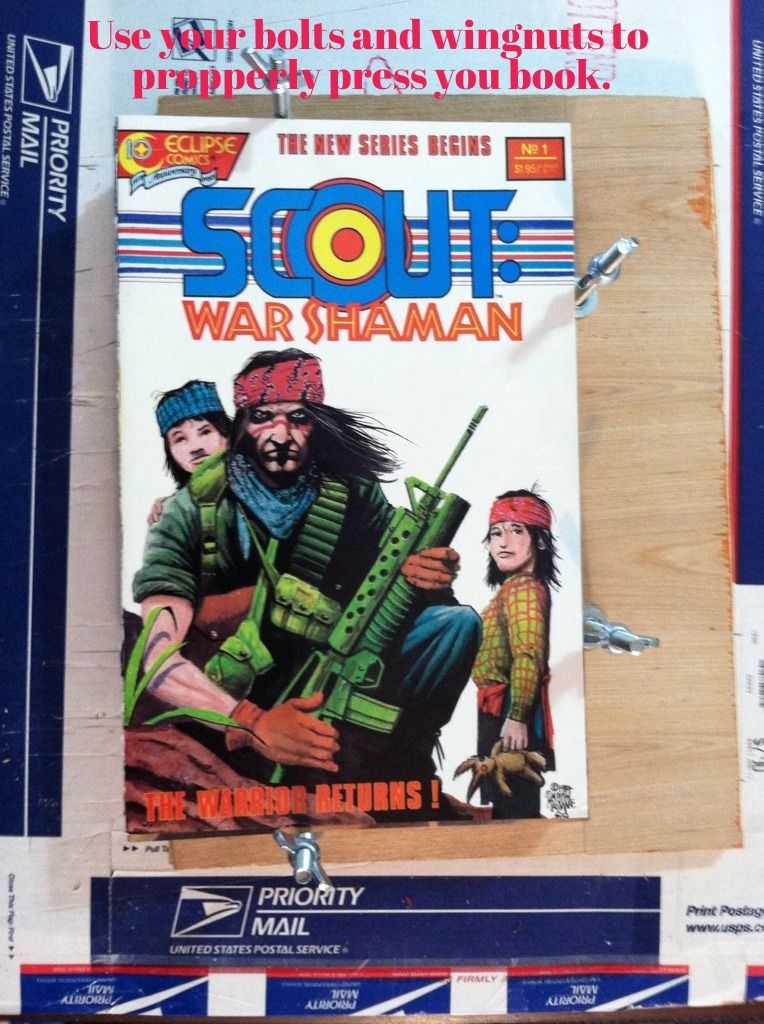
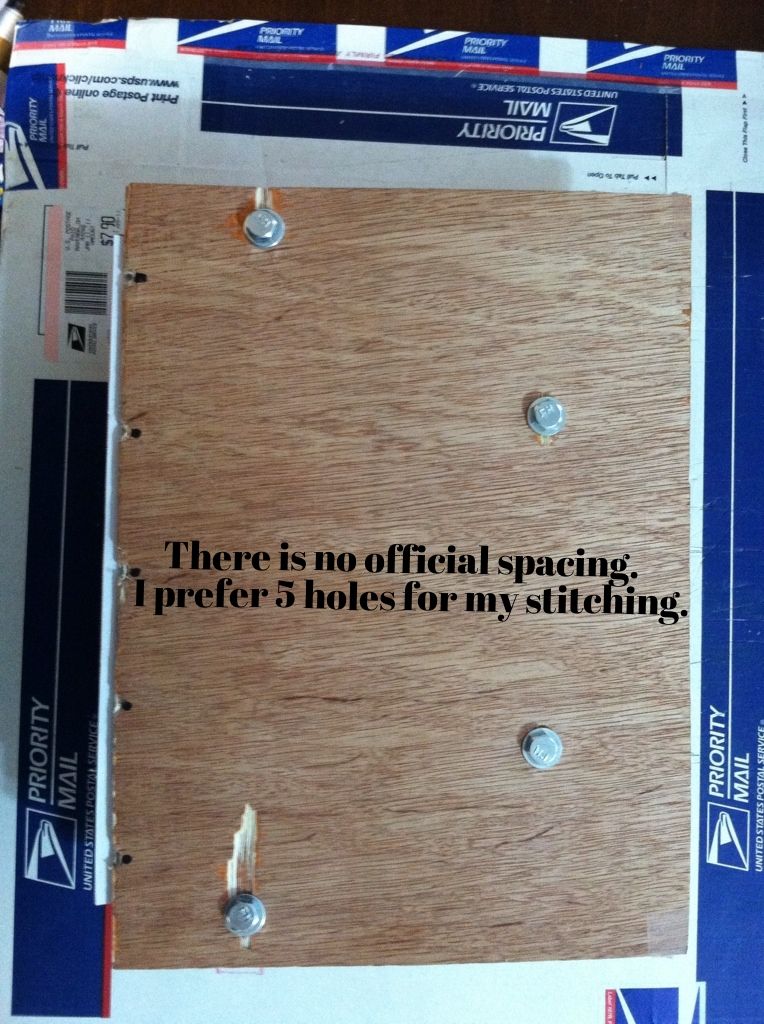
I set up my press so my bolts hold the exact spot I need the comics in to begin drilling. It saves a lot of time trying to line them up by eye. You want about 1/4 of the spine hanging outside of the press.
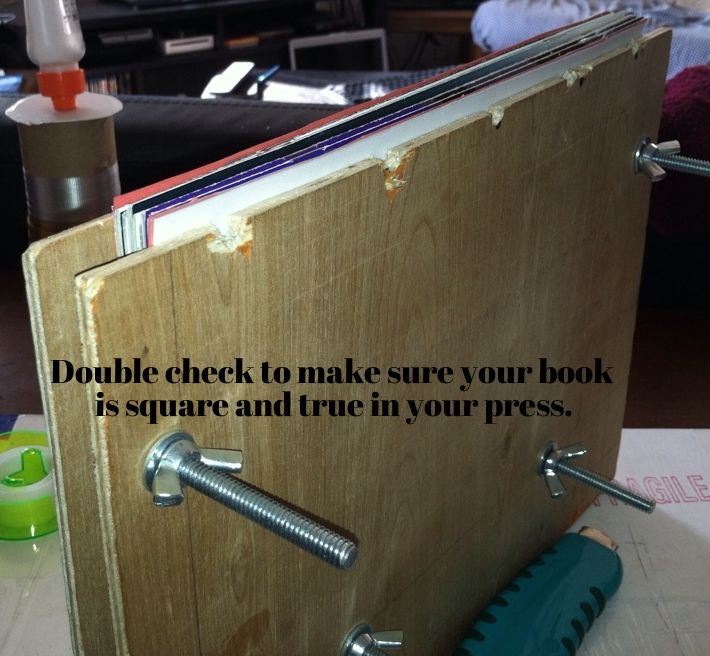
Getting a tight bind starts in the press. You want the stack as tight as possible.
Check you comics one last time before you start drilling.
I have marked my press with dots to help me find my desired hole pattern for stitching.
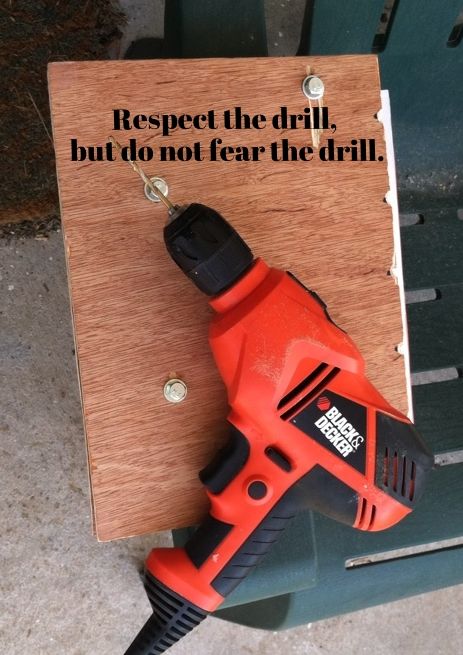
Please use caution when using any power tools. They are fairly easy to use but can cause a lot of damage to furniture, flesh or other valuables if you are not careful when handling them. SAFETY FIRST.
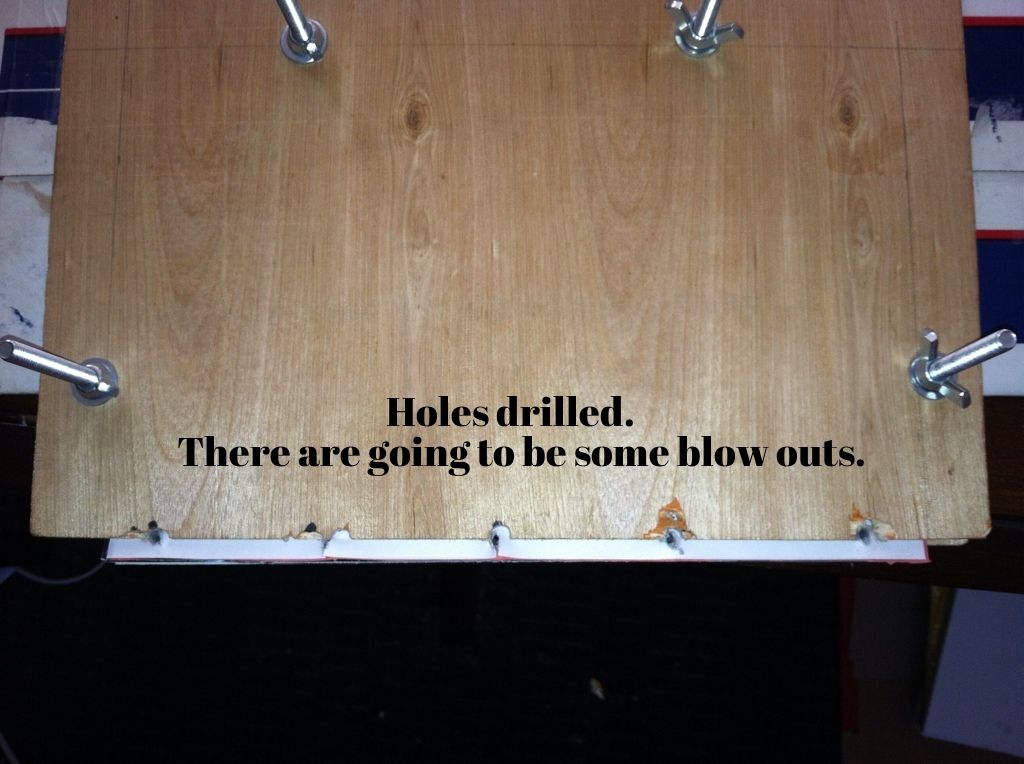
Don't worry if the back side of the end papers have some blow out. It will happen. The binding ribbon will cover these up and correct any roughness to the holes.
You are now at the point of no return. But don't fret, the fun has just begun.
Bean
Sunday, February 16, 2014
Today we are going to look at getting your comics in order and ready to bind.
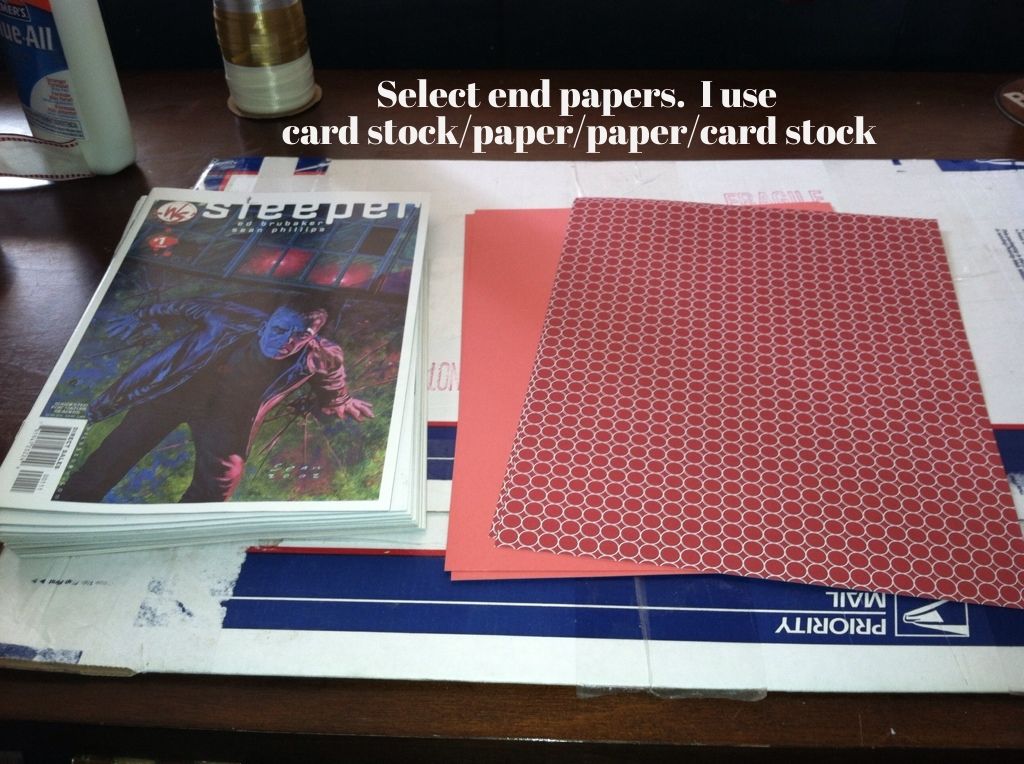
The first step is to prep and cut end papers for your book. The outer most end paper will be glued to your cover and anchors the bind to the chipboard. I originally used paper on the outside and then a card-stock end paper but I soon found out that the more sturdy card-stock works much better as the anchor.
6 to 15 issues seem to be the sweet spot for me. I have gone up to 20 issues for my Kamandi bind, but this is a bit more cumbersome than I like.
Card-stock and colorfully patterned paper can be purchased at Michael's. Remember ALWAYS use a Michael's coupon. They are easily found on the Internet and they will scan them straight from your phone.
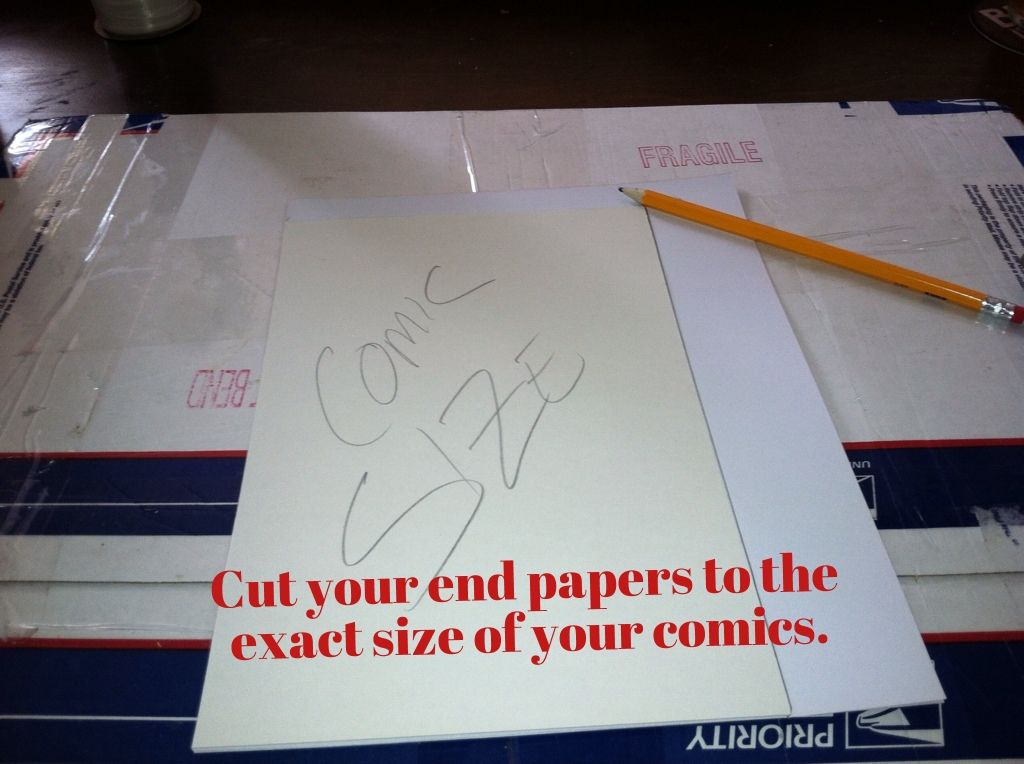
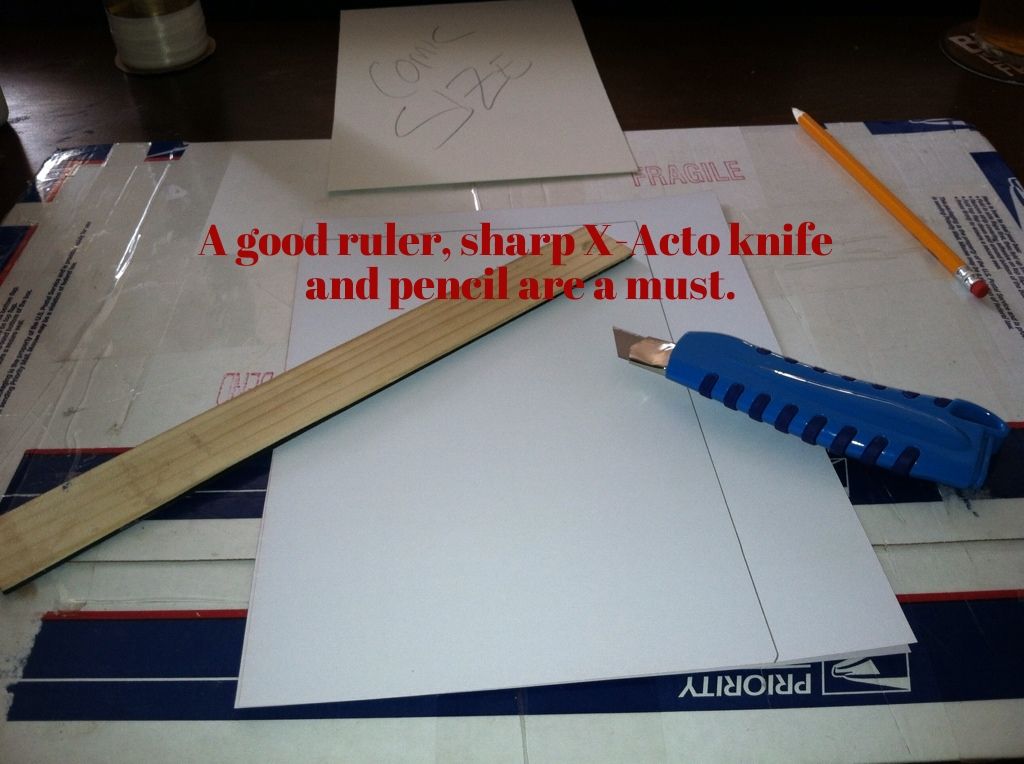
I use an old backer board for my comic size and cover size templates. Double check your comic size though. Some comics are bigger than others. My Thunderbolts run has two different heights due to changes that Marvel was trying at the time.
Note: I use an old USPS Priority box or piece of tempered hard board as a mat so I don't damage my table.
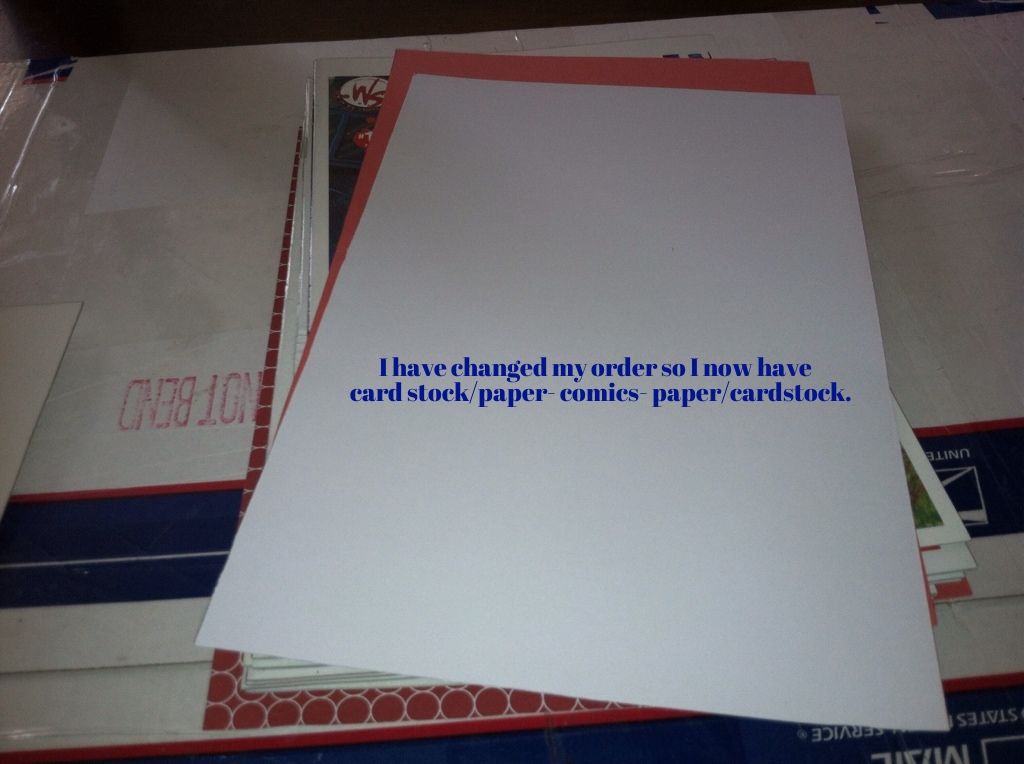
Don't forget, I suggest card-stock/paper-comics-paper/card-stock. Also, double check that your comics are all in order and facing the right direction.
Now you have a book ready to be pressed, drilled and stitched.
Bean
Saturday, February 15, 2014
I was hoping to add another step today but my internet was down for the first half of the day. So, while I was waiting for Verizon to fix my connection, I did a couple of binds instead.
Here are my two from today.
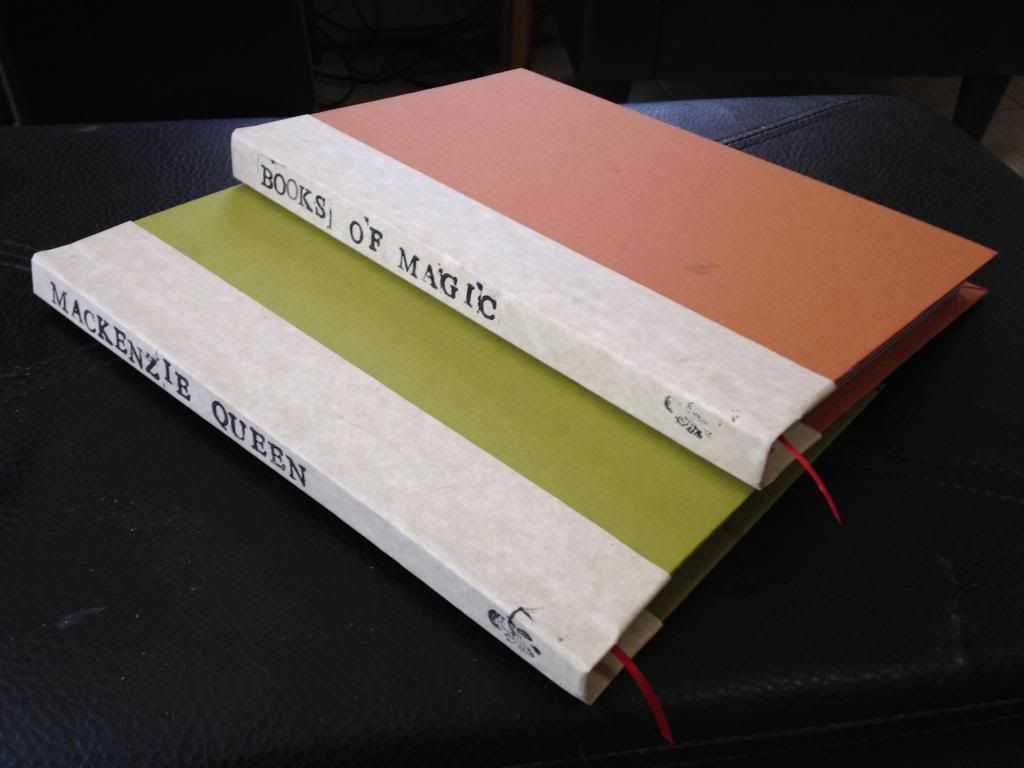
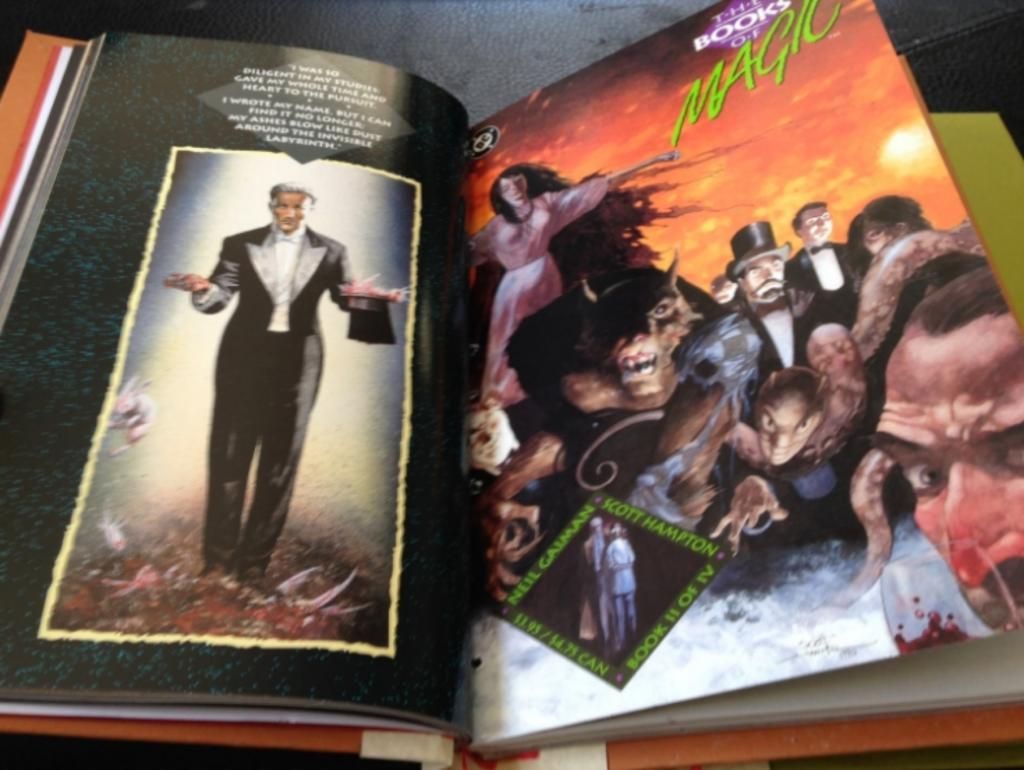
1) The Books Of Magic. I loved this Perfect Bound Mini Series when it came out and need to reread it. It stands a better chance of getting read if its on my bookshelf and not in a long-box.
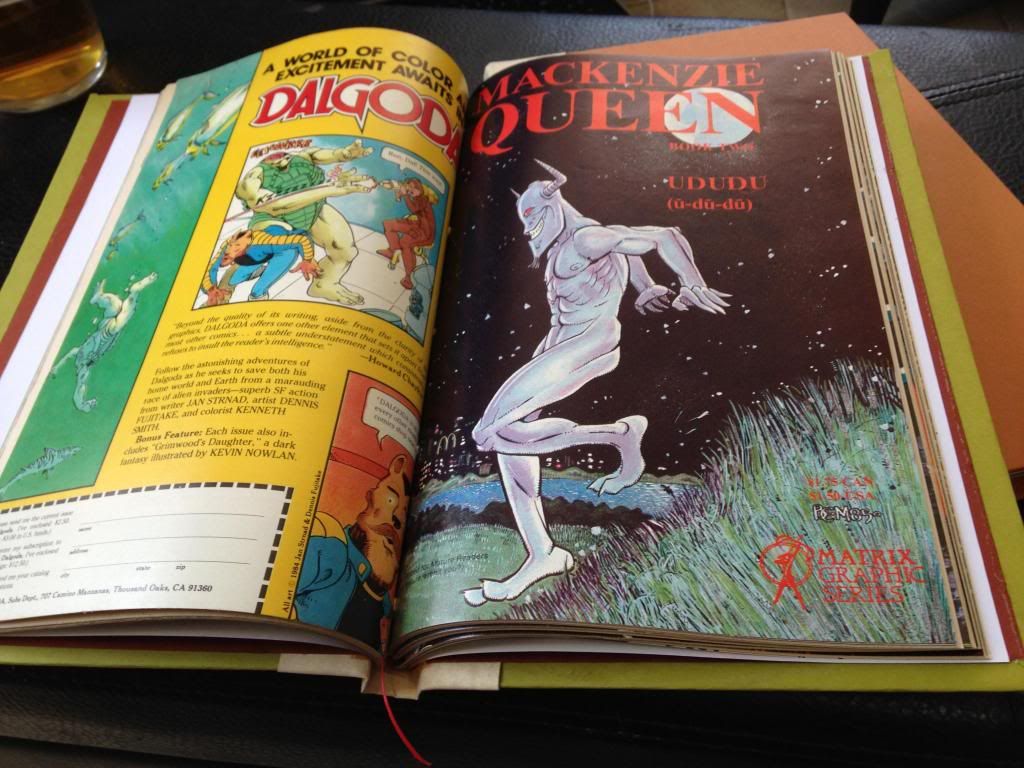
2). MacKenzie Queen by Bernie Mirault. This was a B&W limited series that Bernie Mirault did prior to The Jam and his Grendel run. Once again, it is a work that I need to revisit.
I am extremely pleased with these two binds. Limited gutter loss and the everything fit just right.
As an added bonus, here is a short video of my first home bind. Micronauts 1-12 and Annuals 1&2.
Wow, I was promising a tutorial a year and a half ago. Well it is finally happening.
I will try and post another step in the process tomorrow.
Bean
Sunday, February 9, 2014
Welcome to Home Comicbook Binding. This site will be used to promote the hobby of binding comic books at home. I will be sharing tips and tricks so you too can try this at home. I have been doing home binding for the last few years. I am totally self taught with help from youtube and other binding blog. To date, I have bound approximately 70 books and have received a lot of positive feedback from friends who have seen my work. Over the next few weeks, I will be completing a tutorial that I have been working on for the last year or so. Thanks for visiting the site and feel free to ask any questions.
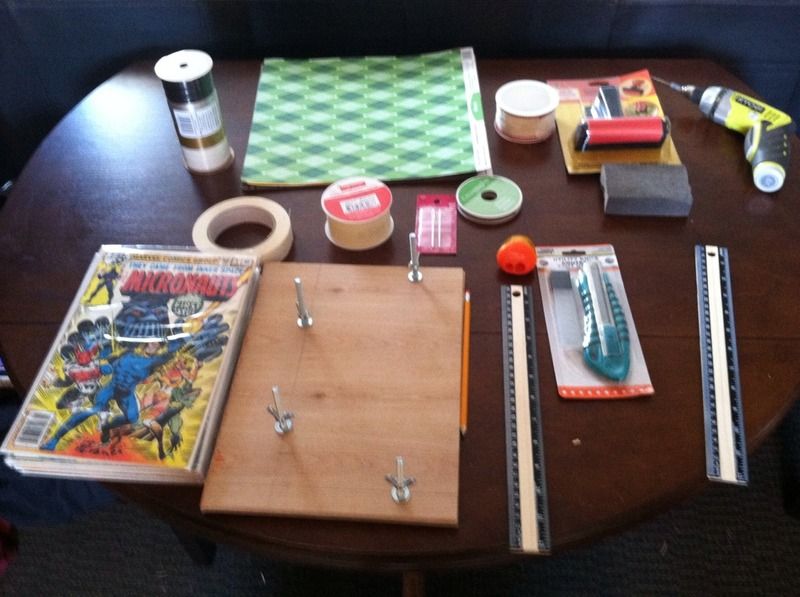
Lets start off with the items you will need to begin binding your own comic book colection. Most of these are either part of your normal home tool chest, or can be purchased at Dollar Tree. There are a few specialty crafting items that you will need. I suggest you get these at Micheals. Always use a coupon at Micheals. They are available on line and give you a minimum of 40% off one item.
Here are the basic tools of the trade (starting at bottom left moving right).
-Comics
-Binding press
-Pencil
-Pencil sharpener
-Ruler
-X-Acto knife
-Tape
-1-1/2" to 2" ribbon (for use on spine)
-Heavy gauge needle
-1/8" to 1/4" ribbon (for use as page marker)
-1/4" plastic ribbon (for use in stitching book)
-12" X 12" card stock and colored paper
-A 2nd roll of 1-1/2" to 2" ribbon
-Decoupage Tool Set (roller and squeegee)
-Drill (corded or cordless) with 1/8" drill bit.
Also needed but not shown
-Elmers Glue-All glue
-Glue sticks
-Alphabet stamps
-Stamp ink
The only item you have to make on your own is the book press. I used some extra plywood I had arond the house. There are a few good videos on youtube which will help you make your press.
Here is one example.
I used a 4 bolt system that help me keep my comics lined up correctly. Keep in mind there is no one way to do this.
So, that is it for step one on the journey to bind you own comic books.